Screen recording has become an essential skill in today’s digital world. Whether you're giving a presentation, creating a tutorial, capturing gameplay, or saving a video call, screen recording offers the flexibility to record what's happening on your device's display in real-time. The process is simple on most devices, thanks to built-in tools and a wide array of third-party applications. This tutorial will cover step-by-step guides on how to screen record on Mac, iPhone, Windows, and even Chromebooks, offering you various methods to capture your screen efficiently.
Why Screen Recording is Useful
Screen recording has multiple applications in both professional and personal contexts. For professionals, it's ideal for presentations, instructional videos, or documenting software bugs to share with a development team. Content creators, on the other hand, use screen recording to capture gameplay, walkthroughs, and other visual content for social media platforms. It's also handy for saving important video calls, creating online tutorials, or troubleshooting technical issues with others. Whether you’re a business user or a content creator, mastering screen recording enhances your digital communication abilities.
How to Screen Record on Mac
Method 1. Using the Built-in Screenshot Toolbar
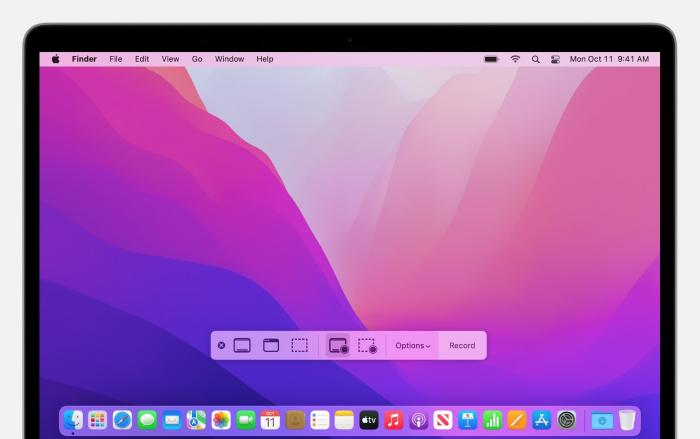
On macOS Mojave and later, Apple introduced a versatile screenshot and screen recording tool that is easily accessible via the Screenshot toolbar. Here’s how to use it:
丨Step 1: Press Shift + Command + 5 to open the Screenshot toolbar.
丨Step 2: From the toolbar, you can choose between recording the entire screen or just a selected portion.
丨Step 3: Once you've selected your recording area, click the “Record” button.
丨Step 4: To stop recording, click the stop icon in the menu bar or press Command + Control + Esc.
· Tips: The video will be automatically saved to your desktop, making it simple to find and edit later.
Method 2. Recording with QuickTime Player
For users who prefer QuickTime Player, Apple’s classic media player also offers screen recording features.
丨Step 1: Open QuickTime Player from the Applications folder.
丨Step 2: Navigate to File > New Screen Recording.
丨Step 3: Choose whether you want to record the entire screen or just a portion. You can also select the audio source from the dropdown next to the Record button.
丨Step 4: Click anywhere on the screen to start recording, or drag to select a specific area. Press the “Stop” button in the menu bar when you're done.
· Tips: QuickTime will automatically open your recorded file, allowing you to trim, edit, or export it.
Method 3. Recommended Third-Party Apps for Mac
If you need more advanced features like annotations or higher-quality audio, third-party applications like ScreenFlow or OBS Studio are excellent options. ScreenFlow offers robust editing tools, while OBS Studio provides more flexibility, especially for live streaming. Both come with their own pros and cons, but they are highly recommended for those looking for additional control over their screen recordings.
How to Screen Record on iPhone

Method 1. Using the Built-in Screen Recording Feature
iPhones running iOS 11 or later come equipped with a screen recording feature built directly into the Control Center. Follow these steps to record your iPhone screen:
丨Step 1: Add the Screen Recording feature to your Control Center by going to Settings > Control Center > Customize Controls and tapping the + icon next to Screen Recording.
丨Step 2: Open Control Center by swiping down from the upper-right corner of the screen.
丨Step 3: Tap the gray record icon, and a three-second countdown will begin.
丨Step 4: To stop recording, either tap the red bar at the top of your screen or return to Control Center and press the record button again.
· Tips: The recording will be saved to the Photos app, where you can view, edit, or share it.
Method 2. Third-Party Screen Recording Apps for iPhone
If you require additional features like video editing or direct sharing to cloud services, apps like DU Recorder or TechSmith Capture are great choices. These apps provide added flexibility, such as live broadcasting and advanced editing capabilities, making them ideal for professionals or content creators who need more than basic functionality.
Also: iPhone 16: New Features, Price, Colors, Cameras, Order Date
How to Screen Record on Windows
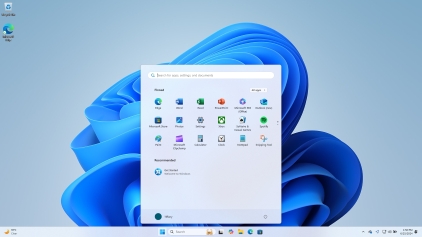
Method 1. Using Xbox Game Bar
Windows 10 and 11 offer a built-in screen recording feature through the Xbox Game Bar. This is primarily designed for gamers but can also be used to record other screen activities.
丨Step 1: Press Windows Key + G to bring up the Game Bar.
丨Step 2: From the Capture panel, press the record button to start recording your screen.
丨Step 3: To stop the recording, click the stop button in the Game Bar or press Windows Key + Alt + R.
· Tips: Your recording will be saved as an MP4 file under the Videos\Captures folder, which you can easily edit or share.
Method 2. Using Windows Snipping Tool
Windows 11 also allows screen recording via the Snipping Tool:
丨Step 1: Open the Snipping Tool from the Start menu.
丨Step 2: Select the area of the screen you want to capture.
丨Step 3: Start recording by clicking the “Record” button.
· Tips: Once you're finished, the video will automatically play in the Snipping Tool window. You can then save it as an MP4 file.
Method 3. Recommended Third-Party Apps for Windows
For advanced recording needs, third-party apps like OBS Studio, Camtasia, or Loom offer more features. OBS Studio is free and highly customizable, while Camtasia provides professional editing tools. Loom is a favorite for quick, cloud-based recordings, particularly useful for sharing instantly with teams.
How to Screen Record on Chromebook
While Chromebooks lack a native screen recording tool like Windows or macOS, there are still plenty of options:
Method 1. Using Chrome OS’s Built-in Screen Capture
丨Step 1: Press Ctrl + Shift + Show windows key.
丨Step 2: Select the screen recording option from the toolbar that appears.
丨Step 3: Choose whether to record the entire screen or a portion.
丨Step 4: Once you're done, press the stop button on the bottom-right corner.
· Tips: The recording will be saved to the "Downloads" folder, from which you can easily share or edit.
Also: How to Take Screenshots on a Chromebook: 3 Easy Ways
Method 2. Third-Party Apps for Chromebook
If you need more advanced features, apps like Screencastify or Nimbus are perfect alternatives. These Chrome extensions offer editing tools, cloud storage, and additional customization options.
Comparison of Screen Recording Features Across Mac, iPhone, and Windows
| Feature | Mac | iPhone | Windows |
| Ease of Use | Easy (Shift + Cmd + 5) | Very Easy (Control Center) | Moderate (Xbox Game Bar) |
| Audio Recording | Yes (with options) | Yes (Microphone) | Yes (Microphone/Game Audio) |
| Built-in Tool | Screenshot, QuickTime | Control Center | Xbox Game Bar, Snipping Tool |
| Third-Party Apps | ScreenFlow, OBS Studio | DU Recorder | OBS Studio, Camtasia |
| Editing Options | Basic | Limited | Advanced (third-party) |
Bonus Tips for High-Quality Screen Recordings 
·· Lighting and Sound: Ensure good lighting and clear sound, especially if you’re recording tutorials or presentations.
·· Resolution and Frame Rate: For smoother playback, set the recording to at least 30fps. Choose a higher resolution if you're working on a high-end display.
·· Editing: Consider trimming unnecessary parts and adding annotations before sharing your video.
Common Problems and How to Solve Them
·· Audio Not Recording: Ensure your microphone is selected as the audio input on Mac and iPhone. For Windows, check that Game Bar or third-party apps have the correct audio settings.
·· Performance Issues: Close unnecessary apps to prevent lag while recording.
·· File Size Issues: Convert your recording to a smaller file format like MP4, or use compression tools if needed.
Conclusion
Mastering the art of screen recording on Mac, iPhone, Windows, and Chromebooks is a versatile skill that can boost productivity and enhance how you share information. Whether you're creating professional presentations, crafting tutorials, troubleshooting issues, or capturing gaming moments to share, screen recording is essential in today’s digital age.
Each platform offers built-in tools for easy screen recording, while third-party apps provide advanced features like high-quality recordings and editing options. Whether you're a content creator, educator, or casual user, learning these tools opens up new possibilities for both personal and professional content creation.