Have you ever needed to resize an image for a website, social media post, or presentation, only to find it becomes blurry or pixelated? Learning how to resize an image without losing quality is essential in these scenarios. Whether you're a professional working with high-resolution graphics or just trying to improve an online post, image quality matters.
This article will provide expert guidance on how to resize images effectively, both online and using software, to maintain their clarity and resolution. You'll explore the best tools available for resizing, discover what causes quality loss, and learn step-by-step guides for each tool. Let’s dive in.
What Causes Loss of Quality When Resizing Images?
When resizing images, quality loss typically occurs because of the way pixels are handled. Images are made up of individual pixels, and when you resize an image, particularly when reducing its dimensions, pixels are often combined or removed. If the resizing process isn't handled carefully, this can lead to a loss of sharpness, making the image appear blurry. Conversely, enlarging an image can cause pixelation, where the image's pixels become visible and reduce its quality.
Choosing the right tool to resize images, whether online or through software, can prevent these issues. These tools use smart algorithms to ensure that the resized image maintains its original sharpness and clarity. Below are some of the best methods available for resizing images without losing quality.
How to Resize an Image: Using Online Tools
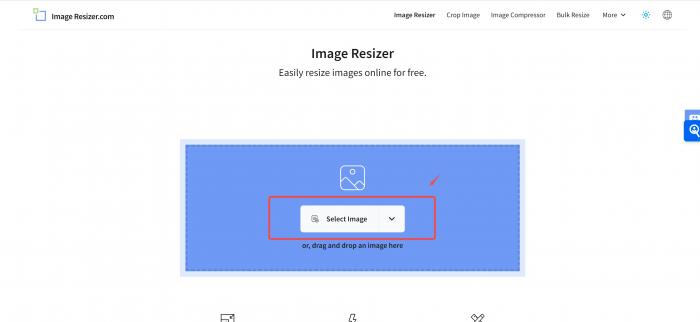
1. Resize an Image with ImageResizer.com
ImageResizer.com is a straightforward and highly efficient online tool that allows users to resize their images without much hassle. Designed for speed and simplicity, it lets users upload, resize, and download images in just a few clicks. The platform supports a wide range of image formats like JPEG, PNG, and BMP, making it versatile for various projects. Its minimalistic interface is great for beginners, though professionals might find the lack of advanced features limiting. It’s ideal for users who need to resize images quickly without worrying about complex settings or additional software.
While ImageResizer.com is excellent for basic tasks, it doesn't offer batch resizing or more complex editing features, which may be a drawback for those handling multiple images or needing advanced controls.
丨Step-by-Step Guide:
Step 1. Visit ImageResizer.com and click "Select Image."
Step 2. Choose your image from the file directory and upload it to the resizer.
Step 3. Set the desired width and height for resizing.
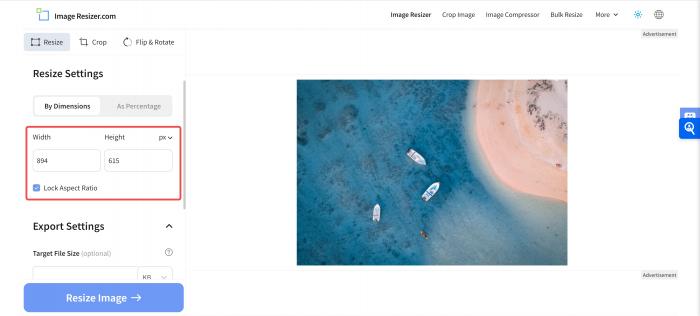
Step 4. Customize the other settings if you want, including the target file size and the output format.

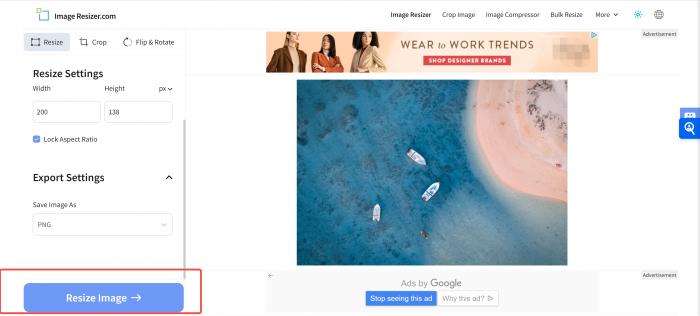
Step 4. Click "Resize Image" and wait for several seconds.
Step 5. Download your adjusted image to your device.

丨Key Features of ImageResizer.com:
· Supports various image formats such as JPEG, PNG, BMP.
· Easy drag-and-drop upload system.
· No need for sign-up or installation.
2. Resize Your Image with Adobe Free Image Resizer
Adobe Free Image Resizer is a web-based tool from one of the most trusted names in the creative industry. This tool allows users to resize images without needing a subscription to Adobe Creative Cloud, making it accessible to everyone. It retains the quality of images while resizing and supports various formats. It also offers the benefit of Adobe’s highly sophisticated image optimization algorithms. However, it lacks additional editing tools unless you upgrade to a paid version of Adobe’s broader suite of products.
The free version of Adobe’s image resizer is perfect for high-quality resizing, but users looking for a fully featured photo editor will need to explore Adobe's premium options.
丨Step-by-Step Guide:
Step 1. Open Adobe Free Image Resizer and click "Upload Your Image."
Step 2. Select your image from your computer.
Step 3. Enter your preferred dimensions.
Step 4. Click "Download" to save your resized image.
丨Key Features of Adobe Free Image Resizer:
· Powered by Adobe’s top-notch image-processing algorithms.
· Retains high image quality post-resizing.
· Free to use with no installation required.
3. Resize Images with iLoveIMG
iLoveIMG is a feature-packed tool designed for bulk resizing, making it ideal for users who need to resize multiple images quickly. Beyond resizing, the platform offers additional tools such as compressing, converting, and cropping images. It's an all-in-one solution for basic image manipulation tasks. The platform is intuitive and provides options to keep or change file formats, ensuring that the output is suited for specific needs. It is especially useful for those working with large image galleries or web content that requires frequent resizing.
iLoveIMG offers excellent functionality for bulk resizing, but its free features might feel limited for professionals who need advanced image editing options.
丨Step-by-Step Guide:
Step 1. Visit iLoveIMG.com and upload multiple images.
Step 2. Set custom dimensions for the images.
Step 3. Select the desired file format and quality settings.
Step 4. Click "Resize Images" and download the results.
丨Key Features of iLoveIMG:
· Bulk image resizing for faster processing.
· Supports numerous file formats, including BMP and TIFF.
· Offers additional tools like compressing and cropping images.
4. Resize an Image with Simple Image Resizer
Simple Image Resizer lives up to its name by offering a clean, easy-to-use platform focused solely on resizing images. Unlike some of the more complex tools, this one is aimed at users who want to get their task done without extra features or distractions. It allows users to resize images by percentage or specific dimensions and offers support for multiple file formats like PNG and JPEG. While it lacks advanced features, it’s ideal for users who need a quick and efficient solution.
Simple Image Resizer is perfect for quick resizing tasks but doesn’t offer advanced functionality like batch processing or image editing, limiting its use for more professional or complex needs.
丨Step-by-Step Guide:
Step 1. Upload your image by clicking "Select Image."
Step 2. Enter the width and height you desire.
Step 3. Select the output format, if needed.
Step 4. Click "Resize" and download the image.
丨Key Features of Simple Image Resizer:
· Resize images by percentage or custom dimensions.
· Supports various formats like JPEG, PNG, and BMP.
· Simple, user-friendly interface with no registration required.
5. Resize Images with PicResize
PicResize offers fast and efficient single-image resizing. It is built for users who need quick image adjustments without losing quality. The platform is very intuitive, allowing users to upload an image, resize it, and download the final result within seconds. Though designed for basic resizing, PicResize also includes some additional editing features like cropping, rotating, and applying filters. It’s great for users who need to make simple adjustments before resizing their images.
PicResize is an excellent option for single-image resizing, but it does not support batch resizing, which can be a drawback for users who frequently handle multiple images.
丨Step-by-Step Guide:
Step 1. Visit PicResize.com and upload your image.
Step 2. Choose the new dimensions for your image.
Step 3. Apply any additional edits like cropping or filters.
Step 4. Click "Resize" and download your final image.
丨Key Features of PicResize:
· Simple and fast resizing process.
· Additional tools like cropping, rotating, and adding filters.
· Free to use with no sign-up required.
Also: Top 8 AI Image Sharpeners to Make Your Images Clear
How to Resize an Image: Using Software
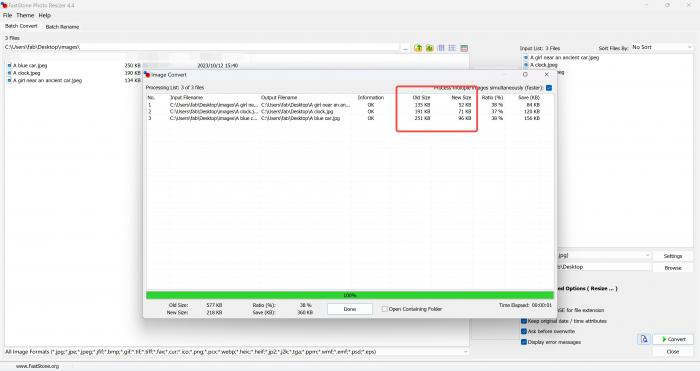
1. Resize an Image with FastStone Photo Resizer
FastStone Photo Resizer is an all-in-one image management software that is both powerful and user-friendly. While primarily used for viewing and organizing images, it also includes robust resizing tools. It supports batch resizing, which is perfect for users who work with large image collections. FastStone offers high-quality resizing while also allowing for basic editing, such as cropping, sharpening, and color adjustment. Its interface, although slightly dated, remains intuitive and easy to navigate.
FastStone is a fantastic option for users who need bulk resizing and basic image editing capabilities, but those looking for more advanced features may prefer other software.
丨Step-by-Step Guide for Batch Processing:
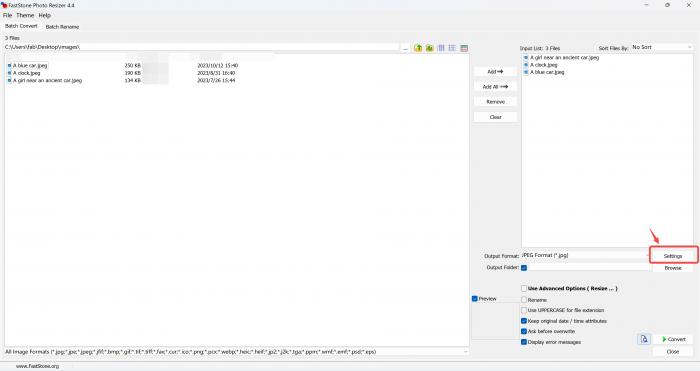
Step 1. Download and Open FastStone Photo Resizer and choose "Batch Convert."
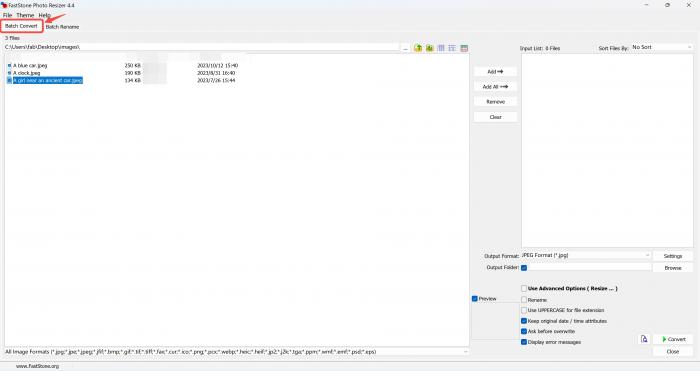
Step 2. Navigate to your image folder and Select the images you want to resize.

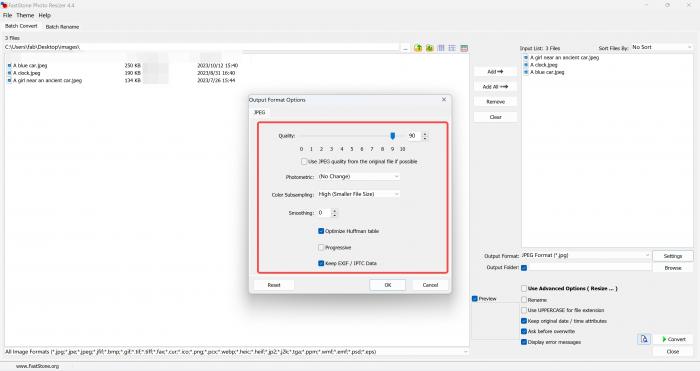
Step 3. Customize image resizing settings before converting.
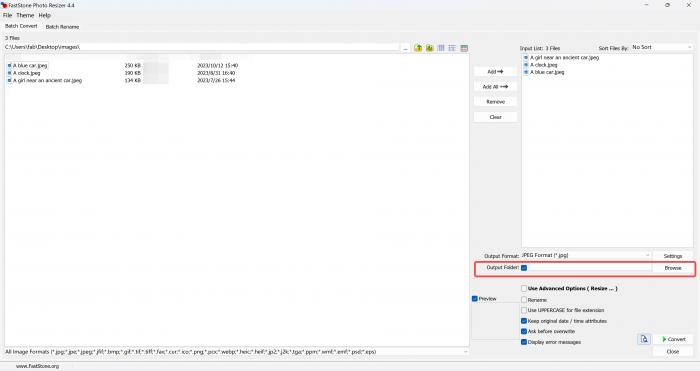
Step 4. Select the output folder to put your resized images.
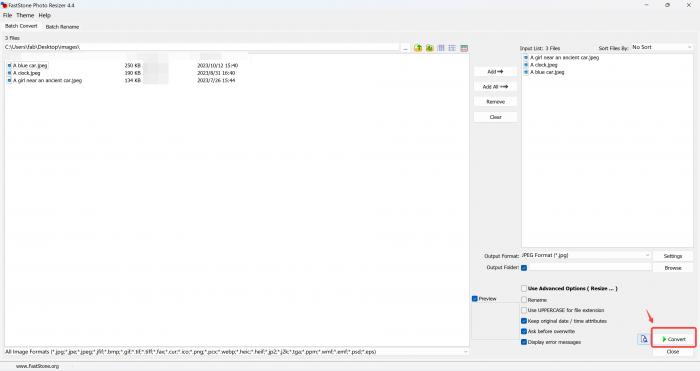
Step 5. Click "Convert" to resize the images.
Step 6. Download the images to your specific computer file.
丨Key Features of FastStone Image Viewer:
· Batch resizing with high-quality output.
· Built-in basic editing tools like cropping and sharpening.
· Supports a wide variety of formats, including RAW and TIFF.
2. Resize an Image with Promo Image Resizer
Promo Image Resizer is a cloud-based tool popular among marketers and content creators. It specializes in resizing images for social media platforms, offering pre-set dimensions for platforms like Instagram, Facebook, and LinkedIn. This makes it ideal for users who frequently upload content to multiple platforms and need the correct size for each. Although cloud-based, Promo Image Resizer maintains the image quality and offers additional editing features like cropping and applying filters.
Promo Image Resizer is fantastic for social media marketers, but its functionality is limited for users who need extensive editing tools or batch processing capabilities.
丨Step-by-Step Guide:
Step 1. Upload your image to Promo Image Resizer.
Step 2. Select the platform or custom dimensions for resizing.
Step 3. Apply any additional edits like cropping or filters.
Step 4. Click "Download" to save your resized image.
丨Key Features of Promo Image Resizer:
· Pre-set dimensions for various social media platforms.
· Cloud-based storage and easy accessibility.
· Supports editing features like cropping and filters.
3. Resize Images with Fotosizer
Fotosizer is a desktop application known for its simplicity and speed in resizing images. It allows users to resize images individually or in batches and includes basic customization options such as resizing by percentage or specific dimensions. Fotosizer also allows users to maintain the aspect ratio of the image, ensuring that it doesn’t get distorted. The software is lightweight, making it a favorite for users who need a no-frills solution for their resizing needs.
Fotosizer is great for batch resizing and quick tasks but lacks advanced editing features found in software like Photoshop.
丨Step-by-Step Guide:
Step 1. Download and install Fotosizer on your computer.
Step 2. Open the software and drag your images into the workspace.
Step 3. Set the desired dimensions or percentage for resizing.
Step 4. Click "Start" to resize your images and save the results.
丨Key Features of Fotosizer:
· Batch resizing capabilities.
· Ability to resize by percentage or specific dimensions.
· Option to maintain the aspect ratio of images.
4. Resize an Image with BeFunky Image Resizer Review
BeFunky offers more than just image resizing. It is an all-in-one image editing suite that caters to both casual users and professionals. Besides resizing, BeFunky includes tools for enhancing photos, adding text, and applying filters. The resizing feature itself is highly customizable, allowing users to set exact dimensions, adjust the quality, and maintain the original aspect ratio. Its clean, modern interface is easy to navigate, making it a favorite among creative professionals.
BeFunky is an excellent choice for those who need more than just a resizer, but its advanced features require a paid subscription.
丨Step-by-Step Guide:
Step 1. Visit BeFunky.com and select "Photo Editor."
Step 2. Upload your image from your device or cloud storage.
Step 3. Click "Resize" and enter the desired dimensions.
Step 4. Download your resized image once finished.
丨Key Features of BeFunky Image Resizer Review:
· Robust photo editing tools like filters and text overlays.
· Customizable resizing with aspect ratio maintenance.
· Intuitive interface, suitable for professionals and beginners.
5. Resize Images with Icecream Image Resizer
Icecream Image Resizer is a lightweight desktop application that provides fast and reliable image resizing. Its standout feature is the ability to resize multiple images simultaneously, making it a great choice for users who need to work with large batches of files. The interface is simple, with an easy drag-and-drop feature that speeds up the workflow. It also allows users to set custom dimensions while preserving the original aspect ratio.
Icecream Image Resizer excels at batch resizing but lacks the advanced editing tools found in more comprehensive software.
丨Step-by-Step Guide:
Step 1. Download and install Icecream Image Resizer.
Step 2. Launch the application and drag your images into the interface.
Step 3. Set your desired dimensions or select a pre-set option.
Step 4. Click "Resize" to save the resized images.
丨Key Features of Icecream Image Resizer:
· Batch resizing capabilities for large image collections.
· Drag-and-drop functionality for ease of use.
· Ability to preserve the original aspect ratio of images.
Bonus: How to Resize an Image in Photoshop
Photoshop offers powerful tools to resize images without losing quality. Follow these steps to ensure your image maintains its sharpness and clarity during the resizing process.
Step 1. Open the image in Photoshop by navigating to File > Open and selecting your image file.
Step 2. Go to Image > Image Size in the top menu to open the resizing window.
Step 3. Enter your desired dimensions in the Width and Height fields, ensuring Resample is unchecked for quality preservation.
Step 4. Select the appropriate Resolution value, usually 300 PPI for print or 72 PPI for web usage.
Step 5. Click OK to apply the changes, then go to File > Save As to save your resized image.
Also: How to Unblur Images for Free Easily in 2024 (Step-to-Step Guide)
Conclusion: Always Test Before Finalizing
Testing your resized image in its intended environment is key to maintaining quality. Different platforms have varying requirements for resolution, and what works for a website may not be ideal for print. Ensuring compatibility across mediums guarantees your image looks its best.
Resizing tools and software can simplify the process, but final adjustments often require a closer inspection. Preview the image in real-time, and adjust settings as needed to maintain clarity and sharpness. A quick review before publishing or printing can prevent any quality compromises.